Tuesday, 9 February 2016

Valentune's Day Makeup Look


So every Tuesday I'm going to do a step by step makeup look over on Snapchat (lipstickglitz) is my Snapchat.

To start it all off this week I've done a Valentine's Day inspired look, here is the look I created

 
Before you do your makeup you should always have a good skincare regime and make sure your skin in nice and clean and prepped.
I cleansed the skin with this amazing Organic Surge Hot Cloth Cleanser

Then I applied this moisturiser to my face.... Aveeno Moisturising Lotion and allowed to set for 5/10 mins before moving onto the next step


Then I sprayed my face with Urban Decay B6 prep spray.. this reduces any redness and closed pores. I love this!!


Then I primed my eyes with COVER FX eye soothing primer over the entire lid and under the eye


Once the skin is prepped I then moved onto the brows. I always do my brows before I do anything else with makeup.

 
I used Inglot's Brow Gel in no.15 and the 17TL brush

 Then for the eyes I used
Inglot 335 shadow for transition colour

Catrice Lilac Maniac into the crease

Inglot 450 to warm up the crease using a Inglot 6SS brush
 

        Then when everything was applied and blended I went back over everything again with a clean 6SS brush. This was to insure all lines and colours where blended nice and looking clean


Then to warm everything up and give it that smokey look I used
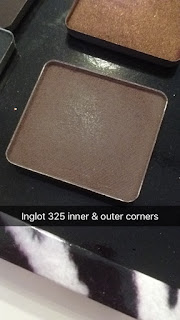
Inglot 325 applied to the inner and outer corners of the eye


I applied 1985 from the Urban Decay Vice Palette onto the centre of the lid

and Inglot Sparkle Dust in the shade 111 pressed on top

using the Inglot 9S brush
 
 
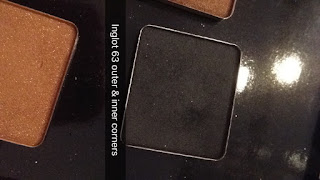
 Then applied Inglot 63 to the outer and inner corners
and Inglot 450 back over it and blended out into crease

Using the Blank Canvas Cosmetics E42 brush
 
 
After that I then moved onto the face and come back to the eyes after I have set and baking the foundation
To start I primed the face using NYX Pore Filler and applied all over face
 
Then I use Cover FX foundation in the shade P30
 
using the Blank Canvas Cosmetics F21 brush in circular and patting motions all over face
 
After that I highlighted under the eyes, bridge of the nose, cupids bow and centre of the forehead using Cover FX Cream Concealer in the shade Light
 
 
and blended all of highlight in using a Sephora Beauty Blender
 
 
Once the highlight was blended I then used the "baking" method to set highlight using Laura Mercier translucent powder and the beauty blender


here is how "baking" looks


While the baking is taking place I went back in and done the winged liner and blended shadow into the lower lash line
For the winged liner I used Inglot Gel Liner in shade 77 with a drop of Duraline to intensify the black, applying it with a 31TL brush from Inglot also

Once liner was done I blended the transition colour 355 from Inglot into the lower lash line

and Inglot 450 on top of transition to intensify and even things out using a Sephora small shadow brush
 
When the eyes where done I brushed off the excess powder from the "baking" and contoured the face using the NYX Contour and Highlighting powder palette and a small NYX Contour brush 

This was the shade I used to contour... it was the second one on the right
and applied to the cheek bones, temples, jaw line and around forehead
 
 
Then I contoured the nose using a Inglot 4SS brush and the same shade of contour
 
 
To blend out the contour I always use this Inglot deep blush shade its that old the number has worn away but I blend it over the contour and up above this slims down the face :)
 Using the Blank Canvas Cosmetics F14 brush
 Then I applied Mac Peaches & Cream to the apples of the cheeks using the same brush
Then to highlight I use Becca Cosmetics Champagne Pop and a Blank Canvas Cosmetics F15 brush and applied it just above cheek bones and above brow
 
 
Once the face is done I applied false lashes. These are Penny/Primark Sultry Lashes
I applied the lashes using Duo Latex Free Glue


Then for the lips I used a lip liner and liquid lipstick
Lip liner is Penny/Primark PS Love range in Plum and L.A Splash liquid lipstick


Here is a small video of the finished look


Let me know what you think of the look... would you wear it?


Rebecca xxx


Wednesday, 3 February 2016

Glove Your Body Dual Facial Cleansing & Exfoliation Pad

A couple of weeks ago the lovely Valerie from Glove Your Body kindly sent me the NEW Dual Facial Cleansing & Exfoliation Pad :)
(This is not a paid post)

 I was delighted when it arrived... as a lot of you already know I'm a massive fan of the Tanning Mitt and the Exfoliating Mitt, so I couldn't wait to give this a try.

The Dual Facial Cleansing & Exfoliating Pad is prices at €9.99 and is a unique duo pad. One side is a  daily cleansing pad and on the other its a exfoliation pad.
Now this to me is defiantly an essential for everyone out there both women AND MEN!! Yes I said it men too. They need to look after their skin just as much as we do.

So on one side is a soft muslin cloth which gently removes dirt and makeup. It ccan be used on its own to or you can apply your cleansing product and remove with the muslin cloth on the pad.

On the other side is the exfoliation pad which is the unique exfoliating material that is used in the exfoliating mitt (which is amazing) This side can be used to remove any stringer makeup products, a long with removing any dead skin cells by giving you a light exfoliation.
 
 
My thoughts:
I absolutely LOVED it! With it being small and compact it is perfect for popping into your makeup bag for on the go, short breaks aways or just for storing in the bathroom with out taking up too much room or needing to have too many products. It really is a multi purpose product.
The handle which can be switched over to the opposite side is great, it holds the pad on your hand and doesn't slip off. I was a little worried that it would happen when swiping it across my face but it stayed in place.
 
Appearance wise I love how it ties in with the rest of the Glove Your Body colour themes and looks part of the family. I love a good print :)
 
When I was using the cleansing side I've used it both with and without a cleansing product. I found for more waterproof or stubborn makeup products using a cleaning product with it will remove the all makeup which is fab! The muslin side was super soft on my skin and as many of you already know I'm extremely sensitive to almost EVERYTHING but my God this felt great on my skin. There was no redness or irritation left on the skin.
 
The exfoliation side I left only for exfoliating my skin I didn't use it for removing more stubborn or waterproof products... you can but my skin as I said is very sensitive and I didn't want to be rubbing this on my eyes or a lot on my skin as I find you'd have to rub back and forth a bit to remove gel liner etc.
This side for exfoliation however was also AMAZING you only had to gently glide this side over the skin and any excess or dead skin just came away without any redness left on the skin. What I done was dampen down the face first and them wiped this side over the skin. The material is the same as the exfoliating mitt and I love that mitt it literally removes any false tan, dead skin without leaving your skin sore, red or irritated so I was hoping it would be just as good for the face and it was!!!
 
I have been using the pad since I got it and wanted to really test it out and give it a proper review and let everyone know how I got on with it, and I'm loving it!! It washes great. I wash it after every use either with my cleanser or soft soap and it washes up back to new. I would advise that you wash it after every use also as you are using it clean your skin and remove dead skin so you don't want to be cleaning your skin with a pad that has dirt on it each time as this will give you spots, sore eyes, and even skin infections :(  so keep it clean!
 
I want to show everyone how well it works for removing makeup without a cleansing product and exfoliating the skin.
 
This is before I used the pad and as you can see I have quite a bit of makeup on and product in my brows.
 
 
This is after and how clean my skin looks a long with feeling super smooth and no redness to the skin even after exfoliating straight after removing makeup.
 
 
Valerie has just informed me that they are doing FREE DELIVERY on the Dual Cleaning & Exfoliation Pad NOW and this amazing offer is WORLDWIDE
So if you plan on picking one up now would be the best time as you would get it for €9.99 plus FREE DELIVERY
 
For more information here's their Facebook and Website  
 
If you have picked up any of Glove Your Body's amazing products or plan on picking them up make sure you let me know how you get on!! :)
 
 
Rebecca xxx  


Thursday, 28 January 2016

Bronze Glitter Makeup Look


                                I created this look today... A warm bronzed, glitter smokey look.
This look would be more of a going out or evening look for anyone who doesn't wear much makeup during the day or tends to keep their makeup very simple for day time....
 But if you are like me any time of the day would suit me :)


Products used for Brows
Urban Decay 24/7 Concealer (lightest shade) & Blank Canvas Cosmetics F17 Brush

Maybelline Brow Drama in shade Dark Brown

Inglot Brow Gel Liner in shade 15 & Inglot 17TL Brush
 
 
Products used for Eyes:
Inglot Transulcent Powder & Inglot 4SS Brush

Inglot 393 & Nima Brush

Inglot 335 for transition colour & Inglot 6SS Brush

NYX two shades of blush and applied with Inglot 6SS Brush
Blended into the creaase

Inglot 450 & 6SS Brush
Added into the crease to add some warmth

Inglot 326 & Blank Canvas Cosmetics E23 Brush
Applied to the inner and outer corners and blended out to remove harsh lines

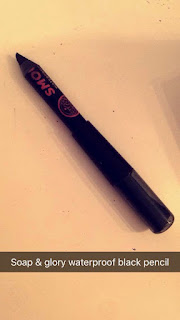
Soap & Glory Waterproof Black Kohl Pencil
Applied to top and bottom water line to darken everything up

NYX XXL Mascara
Applied to top and bottom lashes

Duo Glue (latex free)
Applied to lash band and applied when became tacky

Penny's PS... Sultry Lashes
 
 
Products used for Face:
NYX Pore Filler Primer
Applied a pea sized amount all over the face

Sephora Beauty Blender
Used to blend in foundation

NYX Mineral stick foundations in shade 02, 09
Applied the lighter shade to areas to highlight and darker to the contour areas

Milani Foundations
Applied the lighter shade to all the lighter parts of the face, and the darker to the rest of the face

Blank Canvas Cosmetics F22 Brush
Used to apply Milani Power foudations

NYX Contour and Hightlight powder palette
Applied light yellow shade to highlighted areas and bottom left shade to contoured areas of the face
 

Inglot Blush (shade number has worn off but is a matte warm pink/brown shade)
Blank Canvas Cosmetics F14 brush to apply it

MAC Peaches n Cream Blush
Applied with same Blank Canvas Cosmetics F14 Brush

Becca Cosmetics Champagne Pop Highlight
Applied to high lighter areas

Sephora Pro Fan Brush
Blank Canvas Cosmetics F15 Brush
Both used to apply highlight

Inglot 63 Lip line
Out lined and filled in lips with this

NYX Sandstorm Liquid Lipstick
Applied over lip liner

Make Up Forever Mist & Fix setting spray
Sprayed all over face (3 or 4 sprays) to set everything in place
 
 
Here is how the it all looked
 
 
And that is the finished look and what I used to create it !! :)
( A step by step guide is now live on Snapchat if you want to see how I done it. Snapchat is lipstickglitz )
 
Let me know what you think, and as always if you have any question just ask!!
 
  
                                                                  Rebecca xxx

Tuesday, 26 January 2016

PS... Blender Sponges


At some point nearly everyone has heard about Penny's PS... Blender Sponges. They are only €1.50 each and come in a few different colours and shapes. I'm loving a lot of the PS... Cosmetic products. The lipsticks and lip liners are AMAZING and priced even better!! They are all super cheap so even when you want to treat yourself but have very little to spend you will find something to suit your budget

I picked up two of Blender Sponge's recently when I could finally manage to get my hands on them when they came back in stock. The orange and green shades stood out the most :)
They both have two different shapes and they are just based on personal preference. Both have a smaller pointed end to get closer to smaller areas of the face like around the nose, under eyes, and around the hair line.

I have tried the orange one live on my Snapchat @lipstickglitz is my account if you would like to see how they work.

How I got in....
So when you want to use your blender sponge you soak them in water and then give them a good squeeze and the sponge is left feeling damp. A lot of the time they change in texture and size but sadly this wasn't the case :(

This is before when only taking out of its packaging

This is the after pic when it was prepped for using it
You can see from the pic there is no difference.
 
 
I used my Makeup Forever HD foundation which is a medium to full coverage without looking too heavy. When I was applying the foundation with the blender sponge as I was bouncing it off my skin it was like it was soaking up the foundation rather than spreading it out all over the skin. It did spread it onto the skin with a lot of bouncing eventually but I ran out of foundation very quickly. It make my foundation look more like a light coverage rather than a medium/full coverage.
 
 
Sadly I was a little disappointed on how it turned out but this has just been on my skin and think they I would use an awful lot of product to get my foundation to its desired effect...if I could! 
It was very hard to wash afterwards too, I couldn't get all the foundation out of the blender sponge.
 
Everyone's skin is different so they could work differently on you just for me it didn't sadly.
 If you want a light foundation look then these would probably be perfect for you just watch the amount of product you are using!!
With them being only €1.50 in price each you can't really complain too much as its not like I forked out loads for them.
 
 
If you have picked any of these up let me know how you got on with them.
 
 
Rebecca xxx  


Monday, 25 January 2016

The perfect nude lip liner and lipstick combo

We all love a nude lipstick shade that will go with most makeup looks but to find a lip liner that matches well with a nice lipstick is an added rare bonus!! I managed to get my hands on both that won't break the bank and has great durability.

Here is a look of what they both look like, I applied the lip liner all over the lips first and then the lipstick on top.


I had worn a dark smokey eye using warm browns, burnt orange and black so this lip combo goes great with makeup look with out taking from the eyes.
 
 
So this amazing lip combo is from Inglot
I was giving a voucher from Inglot at Christmas so I skipped over with delight after Christmas in to Dundrum to pick up some new products. I had been looking for a nice matte lipstick that was suitable for day to day use and for smokey eye looks but still wanting to keep it looking quite nude (not half fussy am I?) I came across these two babies and loved them.
The lipstick is €15 and in the shade 411
The lip liner is €10 and in the shade 63
These two are a nude shade with a hint of pink keeping them nice and warm in tone on the skin without being too dark or pink. The quality and durability last all day and they are worth every penny. I love Inglot's lipsticks for their durability I have quite a few already in many shades. I ate and drank wearing these and they lasted all day/night. The matte shades tend to last that bit longer because they are thicker and no shine so they wear away much less, the only thing is they are quite drying on the lips so make sure you pop some lip balm/vasolene on after wearing them.
 
So if you are looking for a nice lip combo that is nude and matte that will go with many makeup looks then this is it!!! This shade would suit many skin tones so don't be afraid to give a pinky nude shade a try :)
If you have picked up either of these let me know what you think of them!!
 
 
Rebecca xxx
 
Facebook        Twitter      Instagram     Snapchat @lipstickglitz
 

Sunday, 24 January 2016

Penny's Makeup Drawers

Hi everyone!!

I'm back!!! I took a couple of weeks out from blogging but I'm back :)

Yesterday I woke to the madness all over Facebook and the internet and this time is wasn't any of the Kardashian's.... it was Penny's.
They have done it again!! They have really upped their game for beauty products lately and I'm loving it. Yesterday I had to go see with my own eyes just how good these new releases were....

Penny's or Primark depending on where you live brought out cosmetic storage drawers and holders in two shades...clear and pink and priced amazingly. The two small drawers are €4 and the tray that has holders built in are €3..... Now how can you go wrong with them prices??!.

Here's what I picked up
 
Now when I got to Penny's in Dundrum Shopping Centre all they had left was the pink shade but the colour ties in with my makeup table so I was happy with that.
The shelf was crowded with people dying to get their hands on what was left.

I picked up the two drawer sets and one tray style to stack on top. I got these to hold lipsticks on my table keeping them neat and tide and here is how they look....
 
I'm delighted with how they look, I have all lipsticks in the drawer in order of colour and on the top I have all liquid lipsticks (which are my little obsession at the moment).
Size wise the drawers and tray are quite small so you wouldn't get too much in them. I have eight lipsticks side by side in each drawer if that gives you a rough guide in size of width and you have stack the lipsticks up to two height wise per drawer. Ideally these would be perfect for holding small makeup products like eyes shadows, pigments, lipsticks, blushers etc.
These are perfect for all ages even for holding and storing hair accessories if you didn't want them for makeup. They have many uses.

If you are lucky enough to get your hands on them while stocks last then definitely do they are worth it!! I have a feeling we will be seeing lots of these going up on Facebook and that with lots of different uses so keep and eye out and if you have picked some up make sure you let me know what you put in yours :)


                                                                 Rebecca xxx


Facebook          Instagram         Twitter       Snapchat: @lipstickglitz