Showing posts with label Pennys. Show all posts

Thursday, 16 November 2017

Ps Custom Glow Liquid Highlighters


Penny's have done it again!!!  Just when you think they can't out do themselves they do!!! A couple of weeks ago they brought out three different shades of Custom Glow Liquid Highlighters priced at €5 each.


Moon Shine, Pearl Blossom, Stargaze


I wouldn't use liquid highlighters too often on my own face when doing makeup but said I would pick these up and see how I got on with them. For €5 each you couldn't not pick them up!!


Swatches of all three together.....
 
How could you not love these. Look at that glow off each and everyone of them.


Ok so I'm going to start with the first highlighter... MOONSHINE


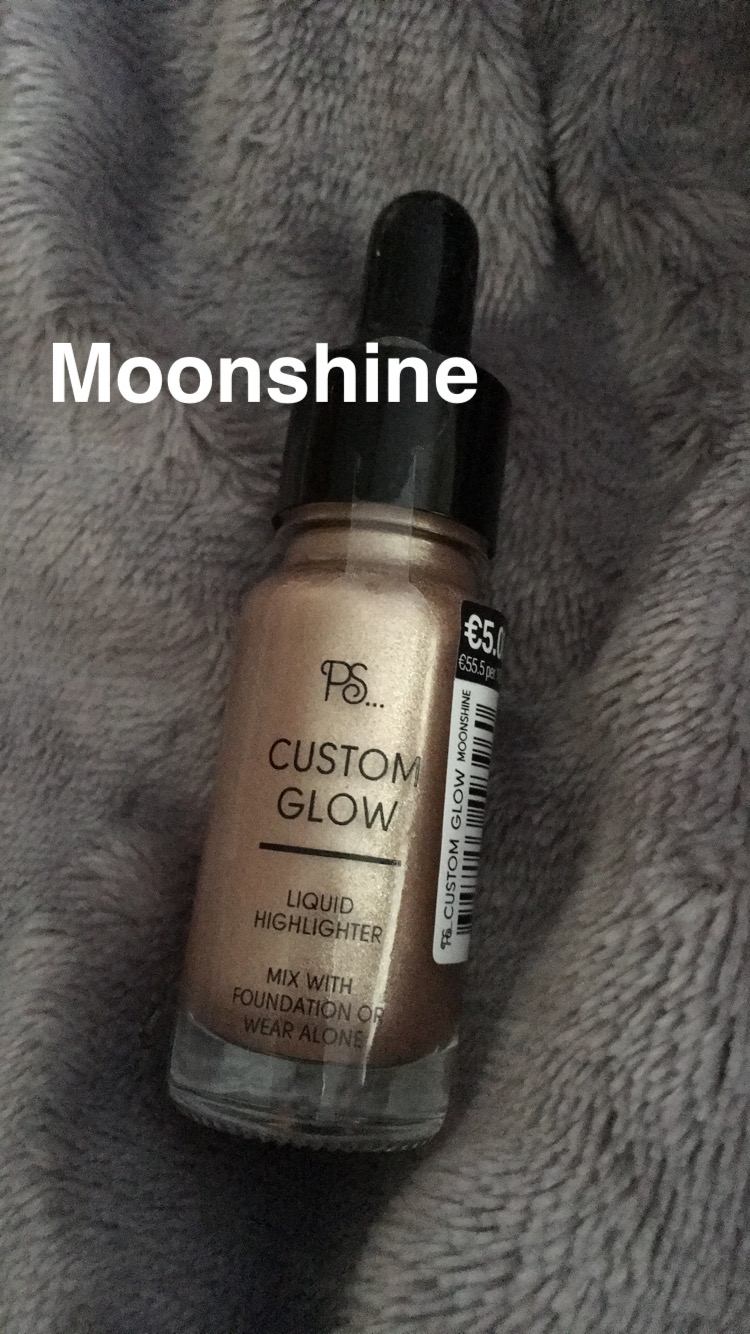
Moonshine is the softer of the three shades in my opinion and has a lovely soft golden glow to it. It's fab! With liquid highlighters you can apply them under your foundation to give a glow to the skin with the foundation. You can mix a small amount into the foundation before applying it to the skin and its a more noticeable glow all over the skin. Then you can apply it softly over the foundation to he areas of the face you want it to be seen but its a much more noticeable glow and slightly harder to work with if you are a little bit nervous of using a liquid highlighter.
Moonshine to be is the best shade of the three for apply to the face after foundation. Its so easy to work with too which is great. I applied a small amount above the cheeks and taking it above my cheek bone and around the corner of my eyes up towards the eyebrows. Now this sounds a lot but I only used a small amount and patted it on with my finger then blended it all out and into the skin with a small fluffy brush (similar to what you would use on the eyes)
 
Here's a pic to show you what it was like on....
 
         As you can see its very noticeable but not too much. I applied a soft powder highlighter over it just to set the liquid but you can leave it as it is on its own if you want. I personally just don't like any tacky feeling on my skin.
It lasted all day and stayed in place and held its glow throughout the duration of wearing it which was great.

Now the other two shades PEARL BLOSSOM and STARGAZE are two other stunning shades but a lot more pigmented and noticeable on the skin. These two shades would be fab applied before foundation to give the skin a dewy glow look. Pearl Blossom would be fab on the more paler skin tones and Stargaze of the more warmer skin tones or someone wearing tan.

Here's swatches of the both....


Pearl Blossom is so fab and because of the softer pink tone it would be amazing on paler skin tones, some highlighters can be too "golden" in colour on pale skin tones and this is the winner in my opinion for the paler skin tones :)
Both worn above and under the foundation and it would be amazing !!!


Now Stargaze as you can see is a more golden tone and its stunning. This would be amazing in the summer for a golden makeup look and this applied before the foundation and a little after above the cheeks would look amazing. Imagine this with tan :)
 
It would be soo hard to just pick one shade I think anyways that's why I picked up all three :)
 
You could also pop some highlighter down the front of your skins when wearing tan and showing off the legs. It finishes off the legs lovely.
 
I would highly recommend these highlighters to everyone who loves some glow in their life and for €5 you literally couldn't go wrong so go get ALL THREE you WILL find uses for them TRUST ME!!!!
 
 
If you have picked any of them up let me know what you think of them and if you have tried them how have you found them :) :)


Rebecca xxxx


Thursday, 28 January 2016

Bronze Glitter Makeup Look


                                I created this look today... A warm bronzed, glitter smokey look.
This look would be more of a going out or evening look for anyone who doesn't wear much makeup during the day or tends to keep their makeup very simple for day time....
 But if you are like me any time of the day would suit me :)


Products used for Brows
Urban Decay 24/7 Concealer (lightest shade) & Blank Canvas Cosmetics F17 Brush

Maybelline Brow Drama in shade Dark Brown

Inglot Brow Gel Liner in shade 15 & Inglot 17TL Brush
 
 
Products used for Eyes:
Inglot Transulcent Powder & Inglot 4SS Brush

Inglot 393 & Nima Brush

Inglot 335 for transition colour & Inglot 6SS Brush

NYX two shades of blush and applied with Inglot 6SS Brush
Blended into the creaase

Inglot 450 & 6SS Brush
Added into the crease to add some warmth

Inglot 326 & Blank Canvas Cosmetics E23 Brush
Applied to the inner and outer corners and blended out to remove harsh lines

Soap & Glory Waterproof Black Kohl Pencil
Applied to top and bottom water line to darken everything up

NYX XXL Mascara
Applied to top and bottom lashes

Duo Glue (latex free)
Applied to lash band and applied when became tacky

Penny's PS... Sultry Lashes
 
 
Products used for Face:
NYX Pore Filler Primer
Applied a pea sized amount all over the face

Sephora Beauty Blender
Used to blend in foundation

NYX Mineral stick foundations in shade 02, 09
Applied the lighter shade to areas to highlight and darker to the contour areas

Milani Foundations
Applied the lighter shade to all the lighter parts of the face, and the darker to the rest of the face

Blank Canvas Cosmetics F22 Brush
Used to apply Milani Power foudations

NYX Contour and Hightlight powder palette
Applied light yellow shade to highlighted areas and bottom left shade to contoured areas of the face
 

Inglot Blush (shade number has worn off but is a matte warm pink/brown shade)
Blank Canvas Cosmetics F14 brush to apply it

MAC Peaches n Cream Blush
Applied with same Blank Canvas Cosmetics F14 Brush

Becca Cosmetics Champagne Pop Highlight
Applied to high lighter areas

Sephora Pro Fan Brush
Blank Canvas Cosmetics F15 Brush
Both used to apply highlight

Inglot 63 Lip line
Out lined and filled in lips with this

NYX Sandstorm Liquid Lipstick
Applied over lip liner

Make Up Forever Mist & Fix setting spray
Sprayed all over face (3 or 4 sprays) to set everything in place
 
 
Here is how the it all looked
 
 
And that is the finished look and what I used to create it !! :)
( A step by step guide is now live on Snapchat if you want to see how I done it. Snapchat is lipstickglitz )
 
Let me know what you think, and as always if you have any question just ask!!
 
  
                                                                  Rebecca xxx

Tuesday, 26 January 2016

PS... Blender Sponges


At some point nearly everyone has heard about Penny's PS... Blender Sponges. They are only €1.50 each and come in a few different colours and shapes. I'm loving a lot of the PS... Cosmetic products. The lipsticks and lip liners are AMAZING and priced even better!! They are all super cheap so even when you want to treat yourself but have very little to spend you will find something to suit your budget

I picked up two of Blender Sponge's recently when I could finally manage to get my hands on them when they came back in stock. The orange and green shades stood out the most :)
They both have two different shapes and they are just based on personal preference. Both have a smaller pointed end to get closer to smaller areas of the face like around the nose, under eyes, and around the hair line.

I have tried the orange one live on my Snapchat @lipstickglitz is my account if you would like to see how they work.

How I got in....
So when you want to use your blender sponge you soak them in water and then give them a good squeeze and the sponge is left feeling damp. A lot of the time they change in texture and size but sadly this wasn't the case :(

This is before when only taking out of its packaging

This is the after pic when it was prepped for using it
You can see from the pic there is no difference.
 
 
I used my Makeup Forever HD foundation which is a medium to full coverage without looking too heavy. When I was applying the foundation with the blender sponge as I was bouncing it off my skin it was like it was soaking up the foundation rather than spreading it out all over the skin. It did spread it onto the skin with a lot of bouncing eventually but I ran out of foundation very quickly. It make my foundation look more like a light coverage rather than a medium/full coverage.
 
 
Sadly I was a little disappointed on how it turned out but this has just been on my skin and think they I would use an awful lot of product to get my foundation to its desired effect...if I could! 
It was very hard to wash afterwards too, I couldn't get all the foundation out of the blender sponge.
 
Everyone's skin is different so they could work differently on you just for me it didn't sadly.
 If you want a light foundation look then these would probably be perfect for you just watch the amount of product you are using!!
With them being only €1.50 in price each you can't really complain too much as its not like I forked out loads for them.
 
 
If you have picked any of these up let me know how you got on with them.
 
 
Rebecca xxx  


Sunday, 24 January 2016

Penny's Makeup Drawers

Hi everyone!!

I'm back!!! I took a couple of weeks out from blogging but I'm back :)

Yesterday I woke to the madness all over Facebook and the internet and this time is wasn't any of the Kardashian's.... it was Penny's.
They have done it again!! They have really upped their game for beauty products lately and I'm loving it. Yesterday I had to go see with my own eyes just how good these new releases were....

Penny's or Primark depending on where you live brought out cosmetic storage drawers and holders in two shades...clear and pink and priced amazingly. The two small drawers are €4 and the tray that has holders built in are €3..... Now how can you go wrong with them prices??!.

Here's what I picked up
 
Now when I got to Penny's in Dundrum Shopping Centre all they had left was the pink shade but the colour ties in with my makeup table so I was happy with that.
The shelf was crowded with people dying to get their hands on what was left.

I picked up the two drawer sets and one tray style to stack on top. I got these to hold lipsticks on my table keeping them neat and tide and here is how they look....
 
I'm delighted with how they look, I have all lipsticks in the drawer in order of colour and on the top I have all liquid lipsticks (which are my little obsession at the moment).
Size wise the drawers and tray are quite small so you wouldn't get too much in them. I have eight lipsticks side by side in each drawer if that gives you a rough guide in size of width and you have stack the lipsticks up to two height wise per drawer. Ideally these would be perfect for holding small makeup products like eyes shadows, pigments, lipsticks, blushers etc.
These are perfect for all ages even for holding and storing hair accessories if you didn't want them for makeup. They have many uses.

If you are lucky enough to get your hands on them while stocks last then definitely do they are worth it!! I have a feeling we will be seeing lots of these going up on Facebook and that with lots of different uses so keep and eye out and if you have picked some up make sure you let me know what you put in yours :)


                                                                 Rebecca xxx


Facebook          Instagram         Twitter       Snapchat: @lipstickglitz

Wednesday, 9 September 2015

Wednesday's How To Guide - Applying Individual false lashes.

False lashes can be tricky at the best if times but when it comes to applying them on yourself it can be even harder especially the individual ones!! So this week I'm going to show you how to apply them.
It doesn't matter what type you use they are all applied in the same way. Durability all comes down to the glue you use and if they get wet or not.... So when wearing falsies avoid the tears ladies!!!

What I'm using to show you how to apply the individual lashes is...
Penny's / Primark Lashes €1.50
                                              
Duo Glue & Tweezers
Duo Glue can be purchased from Boot's, Mac, Inglot.


How To Apply:
Place a small amount of glue (pea sized) on the back of your hand or on some tinfoil. Taking a piece of the lashes from the box with the tweezers and gently dab the root of the lashes into the glue on the back of your hand. Starting at the inner corner first. This makes it easier starting here instead of the outer corners because if you start at the outside and work your way in the last bud of lashes might be too long and irritate your eye at the end. Apply the lashes as close to the root of you're own lashes. Making sure not to bring them too close to the inner corners so it doesn't irritate you. Look down with the eye you are applying them too and with you're other eye you can judge how close to get to the root of the lashes.


Once You have applied the first lash you then place the next lash right next to the end of the previous lash, always making sure to apply glue to the lashes first.


As the glue becomes tacky and more secure you can then lightly push the lashes upwards while your eye is open to make them curl up more. Keep applying them one after another right beside where each lash ends. If you don't you will create gaps in the lashes and they won't look as full.


Keep applying them until you reach the end of you're own lash line. Don't worry if the last lash comes off the end of your lash line too much this will give the illusion of a longer lash line (don't get carried away tho and start ticking more on)


         Once you have applied them to the complete lash line they will look like this. You can build them up again with another layer over these by doing the exact same application. This will give them an even fuller, thicker look. When they where all applied I gently pushed them up a little into place so they are all in line with my eye open in the mirror.

 
These lashes will last a couple of days once they are looked after and have not got wet. Water will only break down the glue and destroy the shape of the lashes. You can also use the glue that comes with the pack of lashes it just isn't as strong as Duo Glue but its your own personal preference as to what glue you use :)
If you are applying them for a night out I would suggest to doing all of your eye makeup first and then applying the lashes so as its not effecting how you apply your makeup when they are on.
 
You can also re use and lashes when you take them off just make sure you remove the glue from the bud or band of the lashes before applying more.
 
 
I hope this helps anyone next time they go to apply individual false lashes and as always if you have any questions just ask :)


Rebecca xxx :)